Happy Monday! Some new cards to share

thankyoujar1
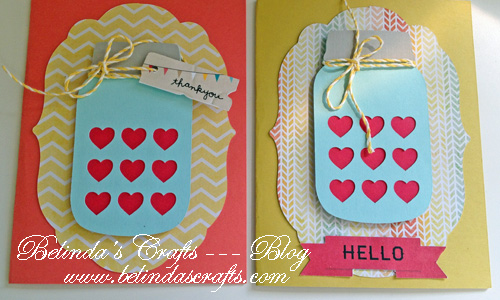
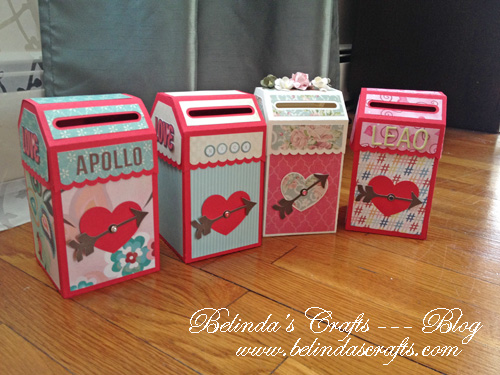
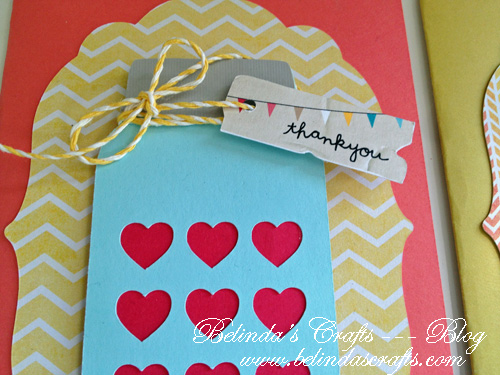
I decided a while back that I had started to stop making cards for friends and family because I kept making cards for my shop. But I enjoy the reactions I get (yup, glory to be had!) from family and friends when I send them a handmade card. So I am on a mission to make cards that I can share separate from my shop.  This is one of the cards I made while at the crop. I used this cute Silhouette file (Design ID #54492). I think it is still on sale so snatch it up if you can.  The cool think about this file is that you can save the inverse (hearts from the jar) and use them on another project.

I made a couple different ones with a little different sentiments.

thankyoujar2

Silhouette Sunday #7: Online Resources

onlineresourcesHello! Happy Sunday!  I am in the process of preparing for a 4-day crafting retreat in a few weeks so I don’t have any recent projects to share but I thought I might share with you some online resources that I like.

The first is called SVGCuts. Wow is the first thing I say each time I visit their site. This husband and wife team rock!  They sell cut-files of the most amazing things. Peek around at their gallery if you need more inspiration.  I recently bought a teapot set and will be sure to share pictures when I complete it. Perhaps I will take it with me to the craft retreat. This site is so great because when you buy the files you get a beautiful PDF step by step instructions and most of the times they have assembly videos.  I own a Silhouette Portrait and for most of their files they include additional files so that I can still make everything and they will end up the same size as if I cut it on the Cameo.

Another site I like is called Lettering Delights (LD) and they provide a variety of things including fonts.  You can sign up for their email notifications weekly for updates and free files.

Monica’s Creative Room is another site that has free cut files.  She does as for donations if you use the files for commercial purposes. She has a bunch of different categories to choose from and then you download them right to your machine. Maybe I could do a demo of how to download files from other sites and how to import them into Silhouette in a future post.

Well I am off to continue planning what to bring for the retreat!

Have a blessed day!

Belinda

Silhouette Sunday #6 – My first Vinyl project – jar labels

vinyllabel1

I opened up my vinyl kit and took out the hook and the scrapper tools. The kit included a variety of colors of vinyl and transfer sheets.  I chose the white vinyl for my kitchen jars.  I went in and found a label shape I liked and stretched it to the size and shape I liked.

vinyllabel2When you use the vinyl you don’t use the cutting mat and set it to the vinyl setting. Then you pull up the excess vinyl.

vinyllabel3The hook tool is so great because it gets right in there and the vinyl comes out easy. This process takes a little time depending on your design. But I actually found this relaxing. I listened to music and watched how my labels transformed.

vinyllabel4The picture above is all the labels I made.  This is after I pulled up all the excess vinyl.

vinyllabel5What? You say that my hands look different? Well then you are correct. That is my husband. I had him help me place the transfer paper on top of the labels.  The vinyl curls a little so the extra hands were helpful. Oh, okay, so I wanted him to see how much fun this stuff is. Can you blame me?

vinyllabel6Once he placed it down I used the scraper tool to press it down evenly so that it would stick evenly to the transfer paper. Which by the way can be reused so don’t throw it away.

vinyllabel7

The labels stuck easily to the transfer paper.

vinyllabel8My husband helped me apply them to my containers.  I just love how they look. They are so pretty and every time I look at them I feel the ‘happy dance’ coming on.

vinyllabel9

Well I hope you try using vinyl if you haven’t already. I am definitely going to think of some more projects to use the vinyl.

Have a blessed day!

Belinda

Valentine’s Mailboxes


valentinesboxes1

Well our 7-days of love has begun at our house. I completed these mailboxes last week and each has been placed near our beds waiting for love notes.  Each day I write 3 love letters and slip one in each mailbox.  Then at bedtime we all open up our mailbox and read them.  The first box, from left to right is Apollo’s then followed by Nicholas’, mine and Leao’s.

valentinesboxes2Of course I had to add flowers to my mailbox because I needed an excuse to use my glue gun and truly can’t resist using flowers.  I also got to use some old brads to attach the arrow so that it could spin.

valentinesboxes3I put it on my nightstand so it is ready to receive some love notes. The book on my night stand is a new one I bought to help me with my genealogy research. More to come on that project sometime in the future.  I you would like to get this cut file for the Silhouette you can find it here.

Have a blessed day!

Belinda


Follow

Get every new post delivered to your Inbox

Join other followers: