Inky Play Friday – Playin’ with my Copics!

Happy Inky Play Friday! I set my distress inks aside for a Copic coloring session. I have this fantastic stamp of a grouping of pumpkins that I bought earlier this year. Autumn makes me think of fluffy blankets, beautiful tea mugs, and pumpkins. We used to carve pumpkins when my boys were younger but as they have lost interest, I moved on to baking with pumpkins. I have a yummy pumpkin cookie recipe that totally fills the house with an amazing aroma.

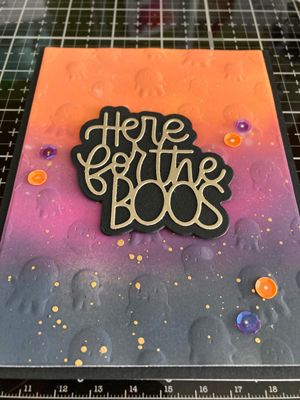
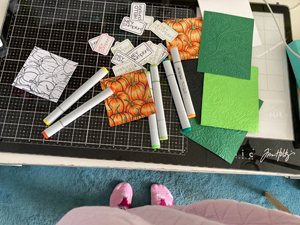
After stamping the images and letting them dry, I went on my Silhouette and designed then print and cut the sentiments so I can use these on some cards. I printed it in a couple of different colors so that I could have options.

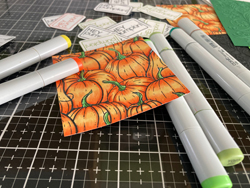
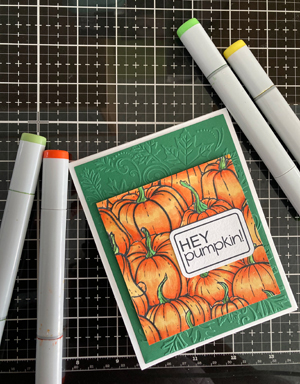
I love finding color combinations for things in nature. I went onto Pinterest to look for pumpkin pictures and to see what color combinations I could find before coloring them. The contrast in this inky play versus the distress inks is so pronounced. When I use the distress inks there is less precision and a lot of random results but with my Copics, I can control the color better. Some days it’s nice to have more control but I am loving stretching my comfort zone with less predictable mediums.

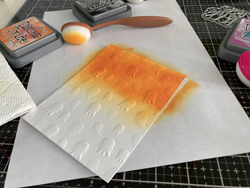
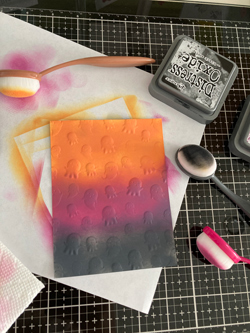
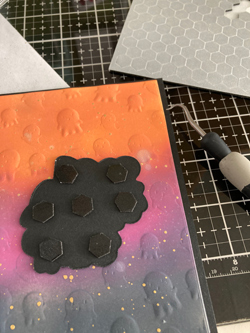
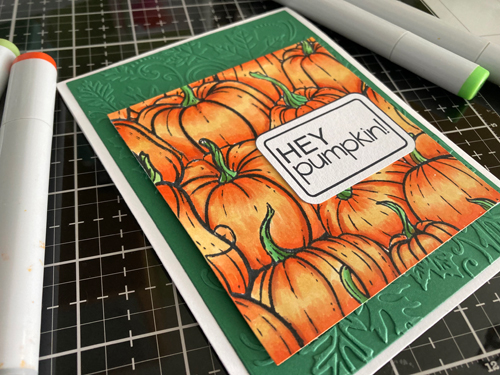
Next, I used a really cool leaf embossing folder to create a dimensional backdrop for the pumpkin display. I decided to create them in a couple of different colors to see how it changes the mood of the cards.

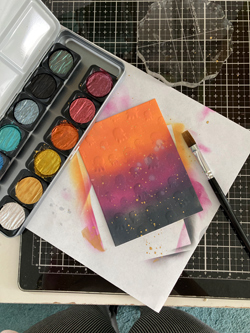
I used my dimensional dots to raise the pumpkin image on the front of the card. They are so much fun to use and they really made the image pop.

I am going to continue to color some more today and try out the different backgrounds.

Have a wonderful weekend!

Inky Play Friday – Painting with Distress Inks

It’s that time…time to play with some inks! Today I am painting with Distress Oxide ink pads. I am always so inspired to craft when I watch craft videos on YouTube. I have been really into my oxide ink pads for the past few months so I have been watching videos where crafters are using them in a variety of ways.

The first thing I did was select some coordinating colors that would look nice on the blue background. Then I heat embossed the ornaments and sentiment with white embossing powder. Then I applied blueprint sketch color onto the back. At first, I was going for a solid background then I started to like the way the lighter areas almost looked like a glowing effect and left it.

Next, was the fun part – painting with the ink. So I rubbed a bit of twisted citron onto my glass mat, gave it a few squirts of water, and then painted the first ornament. It was so relaxing and easy because the embossing keeps your color right where it’s supposed to be. If you haven’t painted with your Distress ink pads, you really should, it’s very fun.

For the first card, I drew the strings with a sparkle pop pen and then used Wink of Stella to give the ornaments a hint of shimmer.

For the second card, I searched my stash for coordinating glitter pens to color in some of the ornaments for a cool contrast.

Here is a close-up so you can see the glitter pens on the second card. I love how they came out. It reminds me of old-fashioned glass ornaments my mother used to hang on the Christmas tree.

I will be sure to incorporate these techniques in future cards because it was really fun.

Have a wonderful weekend!

Inky Play Friday!

Hey friends, it’s Friday, my favorite day of the week! I hope you are ready for some inky play. I rolled up my sleeves, broke out my distress oxide inks, Fintec paints, a new embossing folder, and some sequins to create a Halloween card.

Inspiration

I was inspired by Cathy Zielski’s video, The Best Halloween Embossing folder. I saw her video and knew that I had to have this adorable embossing folder. I have been having a moment with all of my old embossing folders and have been quickly snatching up the new 3D embossing folders that are on the market now. So when I saw her card I ordered the embossing folder to add to my collection. (Warning: Watching craft videos on YouTube can be dangerous for your bank account!)

Inky Play

I realized after I got started that Cathy embossed after she laid down the color. I realized it once I grabbed some of my blending brushes and the same three Distress Oxide Inks that Cathy used in her video and got to work laying down the color. I think the way she did it allows you to saturate the paper more easily because it is a flat surface. So next time I will try it that way to see if I notice a difference. I think it was because I was so excited to see the embossed paper, was the reason I did that first.

I love how the Distress Oxides rich and vibrant colors totally transform the white cardstock. It’s so beautiful to see it in person.

The black soot color was so smoky looking and perfect for a Halloween card.

I did not have a fan brush that Cathy had to apply the water droplets for the reactive effect so I used a regular brush and the result was not as good. I ended up having a few large spots that I didn’t like. I went over them with ink to try to cover them up but then decided I would address them at the end of the process.

I grabbed my Finetec paint set and used the gold color to splatter on the card and it the result was so pretty. Then I cut out the sentiment in gold and black cardstock. I used my new set of black Stampin Up Dimensionals to raise the sentiment. Then I assembled the card.

I wasn’t happy about a couple of the large splatters from the water flicks so I dug out some of my sequins. Because I have so many from when they were ‘the it’ embellishment that I never used and well why not?

I can’t tell you how much I love this card. There is so much to love – the dimension from the embossed ghost, the layered sentiment, the gold splatters, and the bling, bling sequins.

I decided to make a couple more cards to send to some family and friends after I made the first one. The process always goes more smoothly the more you do it.

Have a wonderful weekend!

Tool Time: In Search of a Perfect Adhesive

I’ve got a sticky situation and I need some answers. Haha, a little crafter’s humor to start your day? In all seriousness, I do have a little dilemma when it comes to adhering delicate items to my cards. So I thought I would share what I have found and what I think about them.

As you may know, I have fallen hard for my Big Shot Express die cut machine. I have been using it with my embossing folders and coordinating dies for my stamps. But lately, I have been getting a lot of delicate dies and finding it hard to find just the right adhesive to make the magic happen.

Several years ago, I bought the Multi Medium Matte by Ranger (see photo above). I loved that it came with a pin so the glue wouldn’t dry up and clog. I liked it just fine and squeezing the bottle is very easy. The only problem with this adhesive is that the tip isn’t quite fine enough for very delicate cut files. So that is why I started searching for new alternatives.

Then I went on to use the Gina K Crystalline Drops Pen and I really like that it comes out of a point so that I could use it to lay down adhesive on a smaller surface. However, I find the barrel of the dispenser quite hard to squeeze so once again I found myself looking for other options.

A friend told me about Sticky Specks and it includes 8 sheets that have tiny dots of adhesive all over them. So you lay the object on to it to attach the adhesive dots. I love this thing and I am finally working on my second sheet. You can get a lot of use from these sheets so don’t be fooled. I like it for some items. But at times, very delicate items that are larger are hard to remove without tearing the diecut. Also, the dots sometimes hang out on the sides so I have to go back and remove the excess on the final card layout.

Honey Bee’s Creative Precision tip glue is one of my later purchases and I have to say, I like that the barrel isn’t quite as hard to squeeze as the Gina K. The barrel is also wider. I do like using it so far. I used it on some small cover dies and it worked quite nicely.

The final adhesive I have been playing around with is by Altenew and it is a 2 in 1 glue pen. It dries permanent when used when wet but can be used as a repositionable when used when it is tacky. I have no use for repositionable so I didn’t test that out. The barrel is smaller more like a pen and the tip is a ball-point that releases the glue when you press the tip down. The adhesive inside is very wet and thin so it comes out easily.

I tested this one out by attaching a gem to some cardstock and it did create quite an impressive bond. I like that the tip is fine and that the adhesive comes out easily with no hard barrel to squeeze. I am not sure if I could use it on a large delicate cover die because I think it might dry before I get to them so I’m not sure it is the solution for large cover delicate cover dies. I will need to play around with it more.

Let me know what you recommend for adhering delicate dies.

Follow

Get every new post delivered to your Inbox

Join other followers: