Inky Play Friday – Distress Oxide and Stencils

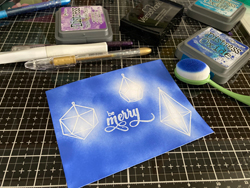
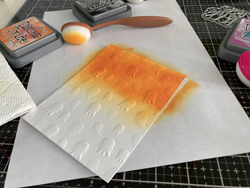
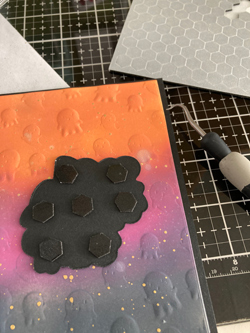
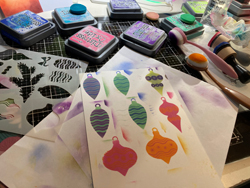
It’s Friday and it’s time to get my fingers dirty! I have these new stencils I wanted to try. The idea is that they can speed up the coloring time for those who don’t want to go the Copic coloring with stamps option. The first thing I realized is that I needed to figure out what order the colors should lay down since it’s a three-stencil process to produce a multi-colored ornament.

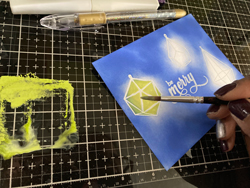
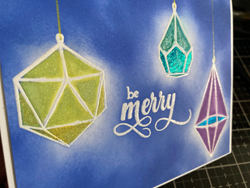
I also needed to figure out which colors go well together. So it was a lot of trial and error. On this first one I laid the green down first and then purple and then I put the green on top. Because the green is sort of neon and bright, it managed to show up on the final layer. I will need to play around more to get different results.

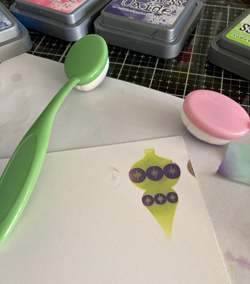
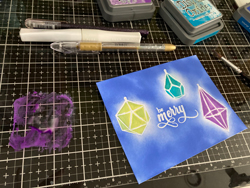
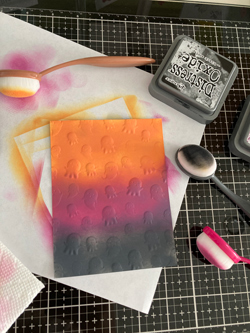
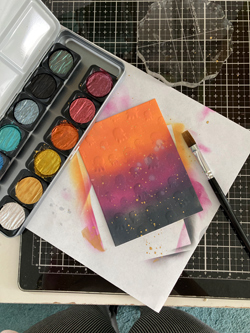
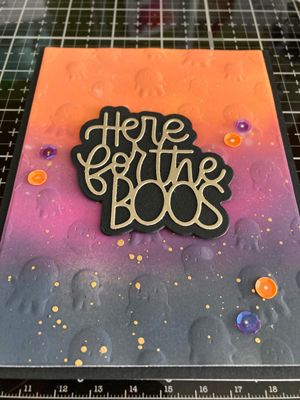
I still liked the results but was anxious to try the other ornaments. I have been loving this purple and I like how it almost look like it was glowing on the edges because the color was lighter on the edges. Unfortunately, you don’t get to see that much because the next two layers cover the edges.

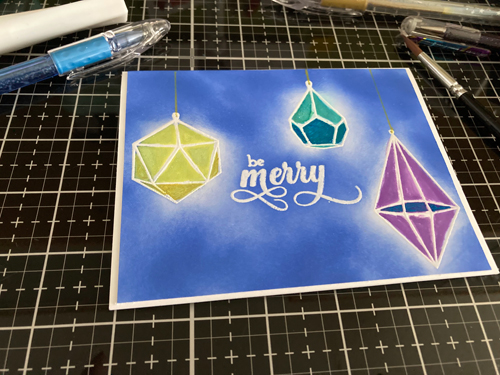
I stopped after filling the page with ornaments so I can see how they look when they are diecut. The result is the first picture you saw at the start of this post. I like how they feel in my hands and the die also debosses areas on the ornament. I really like how they look once I cut them out.

After doing this batch, I think the next time, I will do a batch of all the same base colors and then assembly line add color two and then the final stencil. I think that will make it faster. I will also need to look closely at the Distress Oxide colors that I own to come up with more color combinations.

We are having torrential downpours today and I think my coloring books are calling me. So I am going to say goodbye for now!

Have a wonderful weekend!

Inky Play Friday – Painting with Distress Inks

It’s that time…time to play with some inks! Today I am painting with Distress Oxide ink pads. I am always so inspired to craft when I watch craft videos on YouTube. I have been really into my oxide ink pads for the past few months so I have been watching videos where crafters are using them in a variety of ways.

The first thing I did was select some coordinating colors that would look nice on the blue background. Then I heat embossed the ornaments and sentiment with white embossing powder. Then I applied blueprint sketch color onto the back. At first, I was going for a solid background then I started to like the way the lighter areas almost looked like a glowing effect and left it.

Next, was the fun part – painting with the ink. So I rubbed a bit of twisted citron onto my glass mat, gave it a few squirts of water, and then painted the first ornament. It was so relaxing and easy because the embossing keeps your color right where it’s supposed to be. If you haven’t painted with your Distress ink pads, you really should, it’s very fun.

For the first card, I drew the strings with a sparkle pop pen and then used Wink of Stella to give the ornaments a hint of shimmer.

For the second card, I searched my stash for coordinating glitter pens to color in some of the ornaments for a cool contrast.

Here is a close-up so you can see the glitter pens on the second card. I love how they came out. It reminds me of old-fashioned glass ornaments my mother used to hang on the Christmas tree.

I will be sure to incorporate these techniques in future cards because it was really fun.

Have a wonderful weekend!

Inky Play Friday!

Hey friends, it’s Friday, my favorite day of the week! I hope you are ready for some inky play. I rolled up my sleeves, broke out my distress oxide inks, Fintec paints, a new embossing folder, and some sequins to create a Halloween card.

Inspiration

I was inspired by Cathy Zielski’s video, The Best Halloween Embossing folder. I saw her video and knew that I had to have this adorable embossing folder. I have been having a moment with all of my old embossing folders and have been quickly snatching up the new 3D embossing folders that are on the market now. So when I saw her card I ordered the embossing folder to add to my collection. (Warning: Watching craft videos on YouTube can be dangerous for your bank account!)

Inky Play

I realized after I got started that Cathy embossed after she laid down the color. I realized it once I grabbed some of my blending brushes and the same three Distress Oxide Inks that Cathy used in her video and got to work laying down the color. I think the way she did it allows you to saturate the paper more easily because it is a flat surface. So next time I will try it that way to see if I notice a difference. I think it was because I was so excited to see the embossed paper, was the reason I did that first.

I love how the Distress Oxides rich and vibrant colors totally transform the white cardstock. It’s so beautiful to see it in person.

The black soot color was so smoky looking and perfect for a Halloween card.

I did not have a fan brush that Cathy had to apply the water droplets for the reactive effect so I used a regular brush and the result was not as good. I ended up having a few large spots that I didn’t like. I went over them with ink to try to cover them up but then decided I would address them at the end of the process.

I grabbed my Finetec paint set and used the gold color to splatter on the card and it the result was so pretty. Then I cut out the sentiment in gold and black cardstock. I used my new set of black Stampin Up Dimensionals to raise the sentiment. Then I assembled the card.

I wasn’t happy about a couple of the large splatters from the water flicks so I dug out some of my sequins. Because I have so many from when they were ‘the it’ embellishment that I never used and well why not?

I can’t tell you how much I love this card. There is so much to love – the dimension from the embossed ghost, the layered sentiment, the gold splatters, and the bling, bling sequins.

I decided to make a couple more cards to send to some family and friends after I made the first one. The process always goes more smoothly the more you do it.

Have a wonderful weekend!

What’s on Your Workdesk Wednesday #591

on my desk…

Hello, my crafty friends! It’s Wednesday and you know what time it is. Time to snoop. For those of you that aren’t familiar with WOYWW (What’s On Your Workdesk Wednesday), head on over to Julia’s Stamping Ground and you will find desks from all around the world where we get to snoop on other crafter’s desks.

I am glad I took my picture of my desk yesterday because we have had a whirlwind of weather this morning. The winds are so high some of the stuff on my deck were rearranged and the rain was pretty heavy. So the natural light in my craft room right now isn’t the best. I am so grateful for the rain despite the winds. We desperately need rain.

On my desk you can see my work and book journal, my current read, Frederick Douglas, my headphones my husband gave me. They are so high tech and the sound is quite divine. I usually listen to music on my Bose speaker while I work but now that my boys are home doing school virtually, I try not to make too much noise. So the headphones are great. You can also see some fall themed flags I will be printing on sticker paper for my bullet journals.

I thought I would introduce you to my new desk mate. Her name is Thea. I hope she will thrive here. I have had a lovely conversation with her today (yup, I talk to my plants). She told me to stop slacking. She is a bit of a bossy one.

I finally went out in the garden last Saturday to clean up a bit and plant my fall mums. My husband even helped a little. He knows the garden is my happy space so when I asked him to join me he was a little surprised.

This is the planter he built for me a few years back and I love it because I can change it for the seasons. I will take another photo once the flowers bloom.

Happy mail is the best during the pandemic. My sister sent me this kitchen towel and candle. The funny thing was that I had sent her a surprised package earlier that day.

New book I just received. It’ an anthology of female authors from the African Diaspora. It is a chunkster so I think I might save it for the new year and take my time with it. But isn’t the cover so beautiful? I just had to take a picture.

Saturday’s craft zoom session was fun as usual. I ended up just playing with new products rather than working on a project. Above is a few dies I recently purchased. I see some come cool projects with these beauties.

Above is a new 3D embossing folder I used some distress oxide on them for color but they look so classy plain white. I can just slap a sentiment on them and they would be complete.

I did complete one card. I used distress oxide with a new stencil. I wanted to create and ombre effect.

Well enough about me. I need to get to some good snooping.

Belinda

Follow

Get every new post delivered to your Inbox

Join other followers: