I’ve got a sticky situation and I need some answers. Haha, a little crafter’s humor to start your day? In all seriousness, I do have a little dilemma when it comes to adhering delicate items to my cards. So I thought I would share what I have found and what I think about them.
As you may know, I have fallen hard for my Big Shot Express die cut machine. I have been using it with my embossing folders and coordinating dies for my stamps. But lately, I have been getting a lot of delicate dies and finding it hard to find just the right adhesive to make the magic happen.
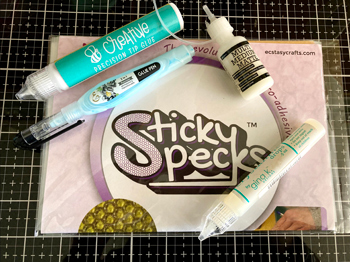
Several years ago, I bought the Multi Medium Matte by Ranger (see photo above). I loved that it came with a pin so the glue wouldn’t dry up and clog. I liked it just fine and squeezing the bottle is very easy. The only problem with this adhesive is that the tip isn’t quite fine enough for very delicate cut files. So that is why I started searching for new alternatives.
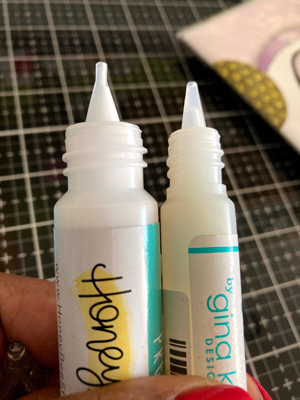
Then I went on to use the Gina K Crystalline Drops Pen and I really like that it comes out of a point so that I could use it to lay down adhesive on a smaller surface. However, I find the barrel of the dispenser quite hard to squeeze so once again I found myself looking for other options.
A friend told me about Sticky Specks and it includes 8 sheets that have tiny dots of adhesive all over them. So you lay the object on to it to attach the adhesive dots. I love this thing and I am finally working on my second sheet. You can get a lot of use from these sheets so don’t be fooled. I like it for some items. But at times, very delicate items that are larger are hard to remove without tearing the diecut. Also, the dots sometimes hang out on the sides so I have to go back and remove the excess on the final card layout.
Honey Bee’s Creative Precision tip glue is one of my later purchases and I have to say, I like that the barrel isn’t quite as hard to squeeze as the Gina K. The barrel is also wider. I do like using it so far. I used it on some small cover dies and it worked quite nicely.
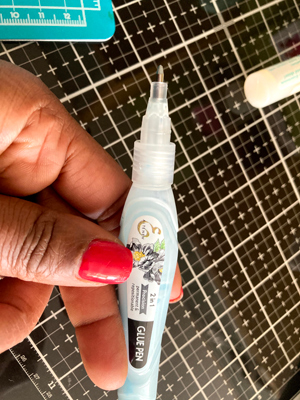
The final adhesive I have been playing around with is by Altenew and it is a 2 in 1 glue pen. It dries permanent when used when wet but can be used as a repositionable when used when it is tacky. I have no use for repositionable so I didn’t test that out. The barrel is smaller more like a pen and the tip is a ball-point that releases the glue when you press the tip down. The adhesive inside is very wet and thin so it comes out easily.
I tested this one out by attaching a gem to some cardstock and it did create quite an impressive bond. I like that the tip is fine and that the adhesive comes out easily with no hard barrel to squeeze. I am not sure if I could use it on a large delicate cover die because I think it might dry before I get to them so I’m not sure it is the solution for large cover delicate cover dies. I will need to play around with it more.
Let me know what you recommend for adhering delicate dies.
 I decided I wanted to make some for Valentine’s Day so I quickly searched my Silhouette files for cute cut files and resized them to fit my mini envelopes.
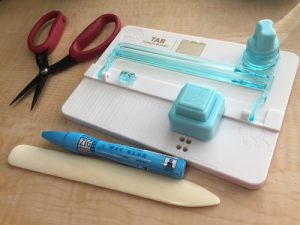 I used some 6×6 paper pads, my scissors, my Zig glue stick, bone folder and of course the tab punch tool.
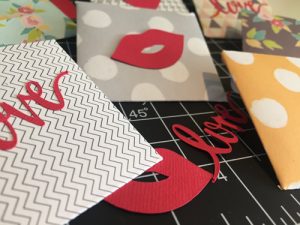
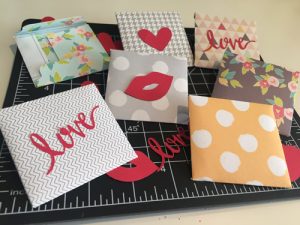 They end up being the cutest 2×2 mini envelopes. I love how the lips and love looked on the paper.
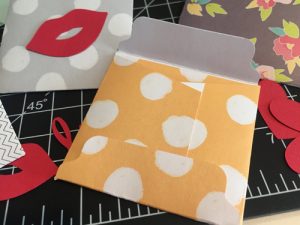 This is a back view of the envelope. I plan on placing a little note inside them for my intended Valentine! So the next time you pick up a tool, don’t hesitate to look online for additional ways to use them.
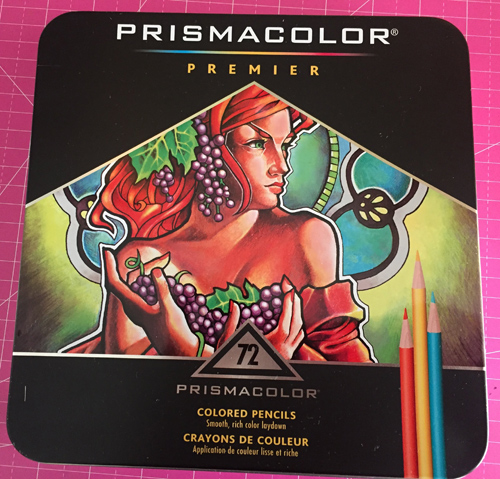 As my collection of pencils grew, I started to get frustrated with the provided storage. I also had an adorable elephant bag where I began collecting my pencils. But when it came time to color, I spent too much time digging around to find the colors I wanted and I also found that I spilled them out of the tin on a regular basis. Aarggh…
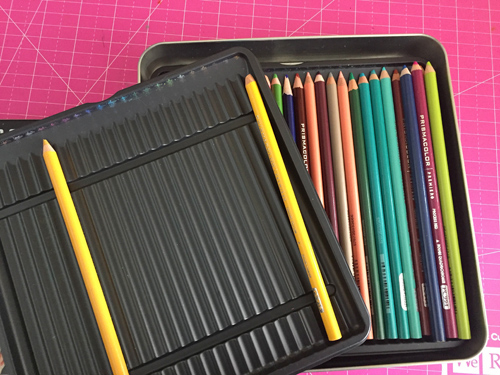 Enter Amazon…my go-to for researching and often purchasing products. I saw so many options but I didn’t want to spend a lot of money. But I wanted something pretty (you know me!). So
 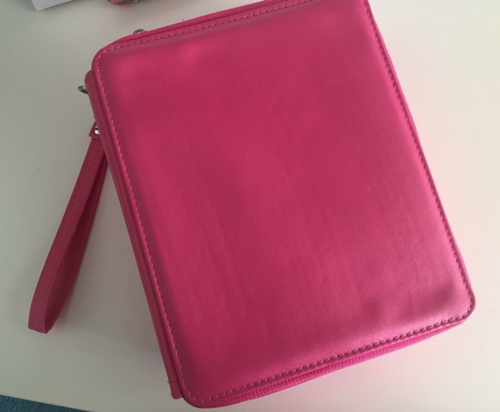 I liked this case because it can hold up to 168 pencils and it had a handle to carry it. As a crafter, we need any help we can get to transport our stuff to craft sessions is a major plus. I also like that it has 4 different sections separated by zippers. I can open one or all and easily access my stuff.
 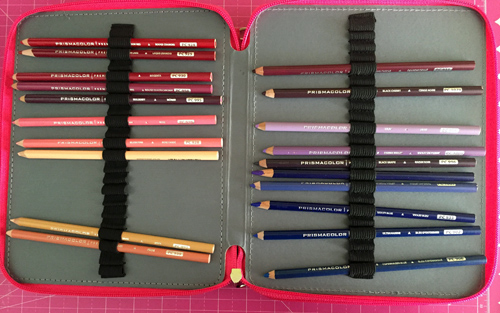 The great thing is that I organized them in order of my color chart so I will always know where to find my colors. Every color has a place and it corresponds to the chart.
 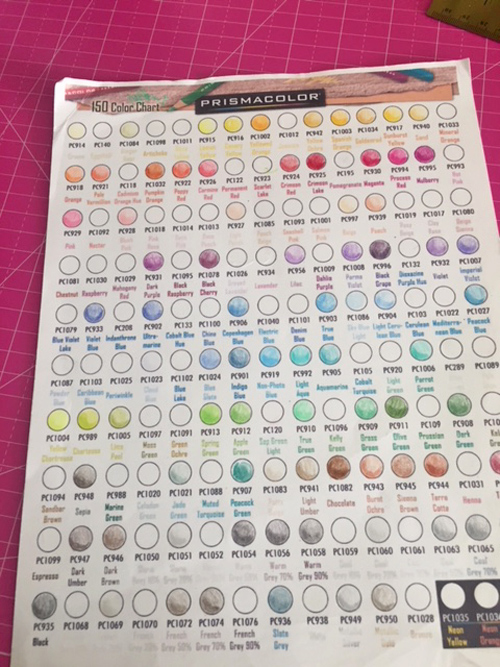 I put it to use and colored up an image in one of my coloring books and it made the process so much fun and no stress about finding colors made it go by smoothly.
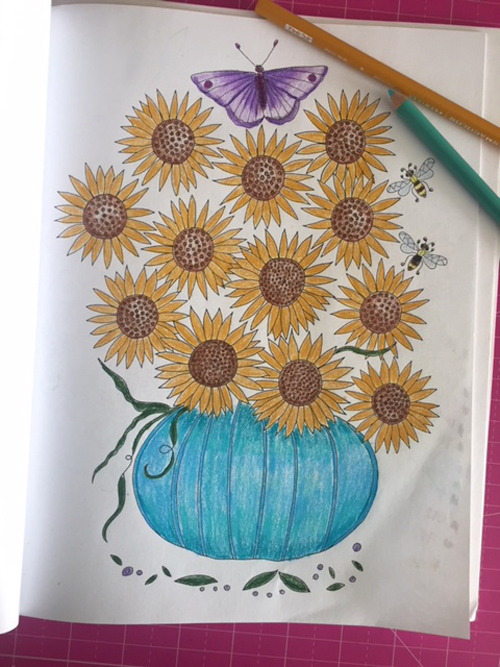 Now I can focus on exploring techniques and filling my coloring books with color!
 Hello, how are you? Despite some plumbing issues that we are dealing with at the current moment, I am actually feeling great. But repairs goes with owning a home and I have no regrets. I love our home and enjoy renovating it with my husband. It’s been a lovely journey watching it evolve as well as our tastes.
 But I digress so let’s talk craft stuff. As you know, I have curbed my craft budget and spending habits so I don’t feature as much stuff on this site. But I recently came across a tool I thought I could use quite nicely for some projects. I also don’t mind spending money on tools because they can be used again and again.