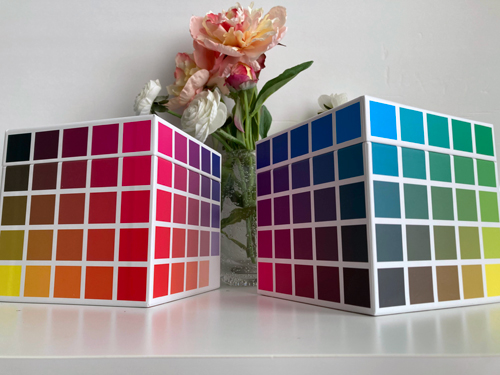
Welcome to Tool Time Tuesday. Where I share a new and sometimes old craft tool that I am currently using. Today let’s take a look at The Color Cube by Sarah Renae Clark. She is one of my favorite colorists I follow online and she has come out with this wonderful product that just gives me all the feels.
Let’s rewind and go back several years ago, when I began going on Pinterest to find color combinations for my cardmaking projects. I love anything that can help me quickly create a color pallette for my projects. I often find inspiration from product containers and patterned papers. Then Sarah came up with a digial product called The Color Catalogue and I used it on my iPad. I purchased her digital version to use on the iPad. It would have a picture of something and then pull out the colors to show you compatible color combinations and she also grouped images into categories so I could find stuff even faster.
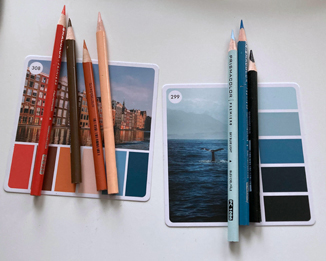
However, as much as I love technology, I am a tactile person. So when Sarah said she was designing a physical product, my ears perked up and I pre-ordered them immediately. You can buy one or both boxes and they contain hundreds of color printed cards in a variety of themes with the color combinations pulled out on the side. One side has the image and the other side has the hex code so you can also use it for digital projects.
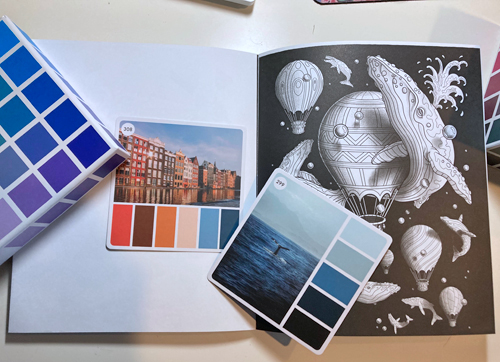
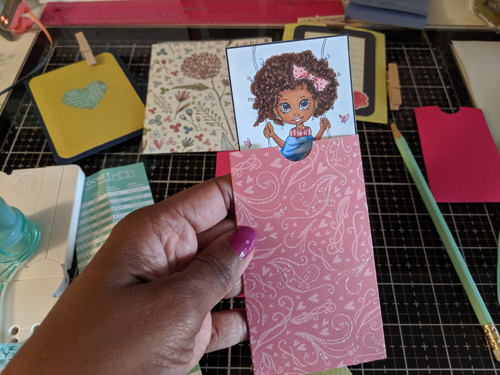
Ok, enough yappin’, I am here to show you how I use it. One thing that can slow me down when I color in my coloring books is committing to a color palette. So I grabbed one of my new coloring books from Christmas and opened up one of the beautiful cubes. By the way, it’s always wonderful when a crafter/artist designs their own products because the quality of the cards and the cubes are impeccable. I have them on my desk and they look like an art.
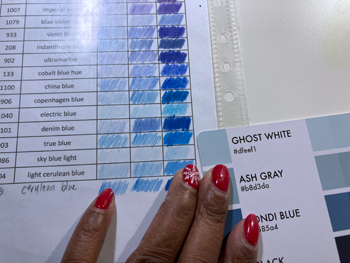
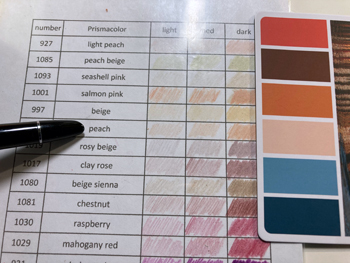
I selected two cards one for the whales and water and the other for all the other images. Then I held them up to my swatch charts for my Prismacolor pencils and found matches then pulled the pencils.
I only selected one pencil for each color because I am working with a grayscaled image but if I were going to do a lot of shading I would select light and dark compatible pencils for each of the colors.
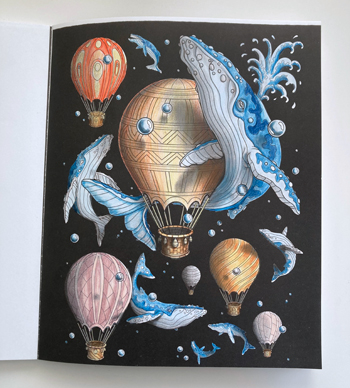
The final page turned out pretty cool. I don’t think I woud have selected those exact colors but I am glad I used the Color Cube for this one.
I will share more with you as I continue to use them. But if you are interested in getting one, check out her video. It might be on waitlist now but well worth it in my opinion.
Happy crafting!


 Hello my creative friends! It’s been a little while since I posted my desk and snooped around yours. Hopefully I can get two in this month. Every other week seems to work better for me. Before I babble, let me explain for the newbies. For those of you that aren’t familiar with WOYWW (What’s On Your Workdesk Wednesday), head on over to
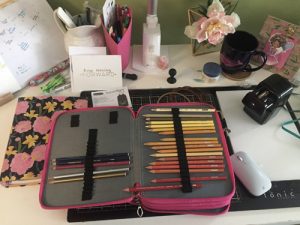
 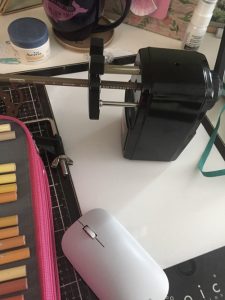 The floral binder is my new garden journal. I couldn’t resist the beautiful color and the flowers oo la la!! It’s smaller than I usually use but I will give it a try and see how it works. It being smaller might help me update it more regularly since it would be bulky and heavy to lug around. Front and center is my case with my Prismacolor colored pencils. To the right of it is my brand spankin’ new colored pencil sharpener. I saw a colorist on YouTube talk about it this past weekend and had to have it. I have two small sharpeners that I use but this one gets the sharpest point and it’s said prevents some of the breaking that occurs on occasion while sharpening the pencils. My hands also get tired using my other manual sharpeners. This one you only need to turn the handle 3-4 turns to get an amazing point. It has a self grip for the pencil so it’s easy to use on my desktop or I can also attach it to my desk with the supplies included. So I am going through my case and sharpening all of my pencils in preparation for my next coloring session. This could not happen with my old sharpeners because my hands would be killing me. So I am happy with this purchase.
 Look how sharp the pencil is after I sharpen it. So excited. Well that is all I have today. But I will spend the next few days checking out what you ladies have been up to since I last visited!