Silhouette Vinyl Starter Kit!

Newvinylkit

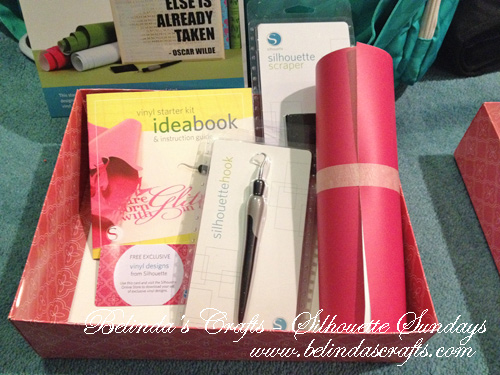
Ok so back during Thanksgiving break, Silhouette had a major sale on all products. I couldn’t resist purchasing a bunch of kits and a travel bag for my Silhouette.  I never wanted to buy them at full price. But with the major discounts I couldn’t turn my back. So with each kit you get a DVD with instructions, the tools, materials and about 10 free exclusive images.  This kit inclued the hook tool for removing the vinyl, the scrapper another tool to remove items, an ideabook, So it was a real bargain. I put them away until after the holidays because I knew I couldn’t commit the time.  But now I am pulling them out. One by one and as I learn, I shall share with you all the amazing things the Silhouette can do. So stay tuned for more.

Here are some examples of some great vinyl projects I have seen on the web that have me super excited to learn how to use it:

20 vinyl projects

Here are some places to buy the vinyl for your projects:

Overstock

Amazon

Have a blessed day! I am going back to watch the Super Bowl.
Belinda

Silhouette Sunday #4 – Organizing your physical cut files

snapalbum1

Hello Everyone! Last week we talked about organizing your Silhouette files in Silhouette Studio/Designer Edition software.  This week, I am sticking to the same organization theme.  One thing that will help you to use those amazing cut files that you have is to go ahead and cut them.

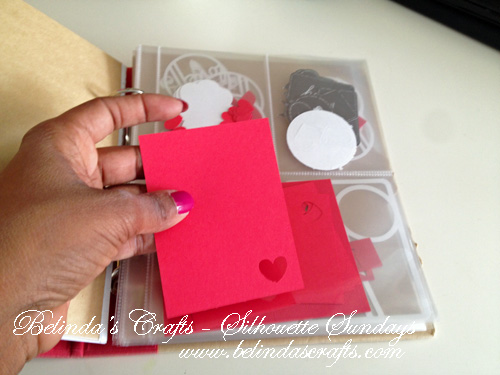
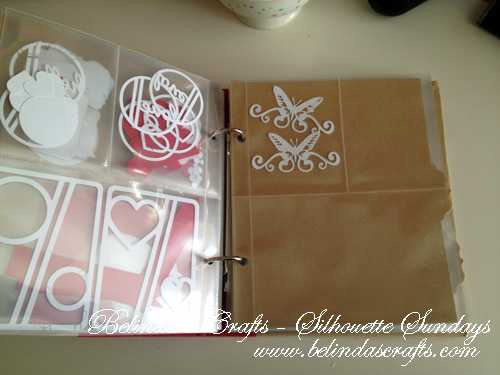
Since I do Project Life and scrapbook, I have a lot of cut files that I use as embellishments and/or 3×4 cards to fit in the page protectors. So I chose a Snap 3-ring album with the Simple Stories Mix and Match 3 by 4/4-inch by 6-inch page protectors to store some of my cut files.  I pick files and fill the page with them cut them by the sheet. This way I have extra ones to use when I need them.  It also keeps the files visible which means I am more likely to use them.

snapalbum1I like these page protectors because I can store small cut files in the smaller pockets and larger files like the 3×4 card I am holding in the picture above.

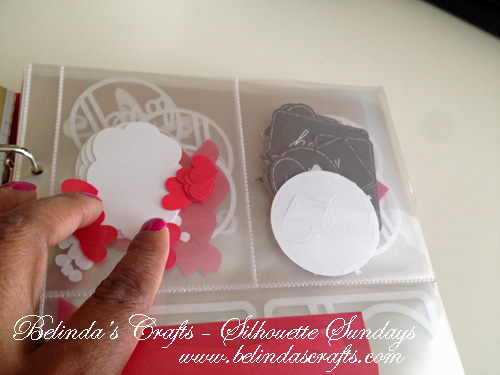
snapalbum2I can keep the small files like the hearts you see in the picture above and I don’t lose them. I can just pull one out and attach it to a scrapbook layout or in my Project Life (PL) album.

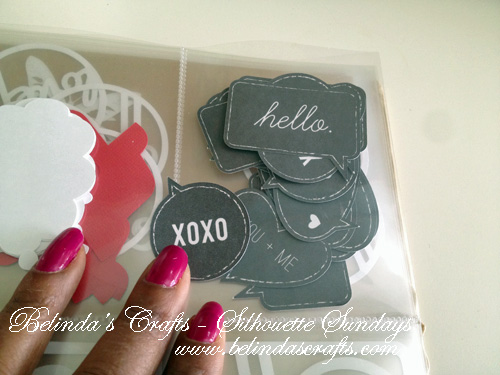
snapalbum4This year, the chalkboard look is popular so I cut a bunch of these chalkboard wordbubbles to use in my PL and layouts.

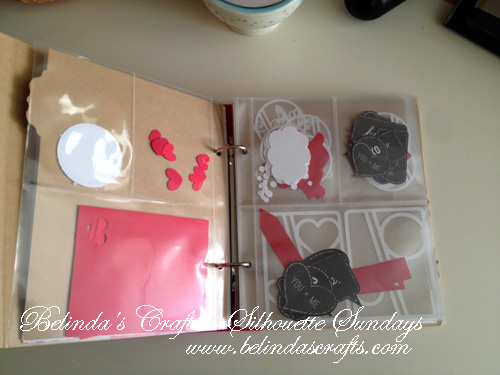
snapalbum3The nice thing is that you can see through the pages so you can see all of the files and to be honest once cut, I want to use them. It’s also portable to take to a crop and you have your own accents.

snapalbum5I know this post is photo-heavy but I love this butterfly flourish file and wanted to show you it. I also plan on adding more full page protectors so I can cut out a bunch of the pretty doily files I have to use on cards and layouts. At this time I don’t have the tabs categorized but something I may end up doing depending on how much I fill the album up.

What type of systems do you use for your files or do you cut at you need them?

Belinda

Silhouette Sunday #3 – Organizing your files

organization1

Welcome back to Silhouette Sunday. Today I want to talk about using your files. I confess, I am weak when it comes to buying files. I buy files from the Silhouette store and I also obtain a whole lot of free files on the web. I will share those sources with you in future posts.

But the problem is that it can add up fast and before you know it, you have hundreds of files you just don’t know what you have and it seems daunting to organize.  But once you do it, you will be able to quickly locate the files you need and stop buying things you already have.

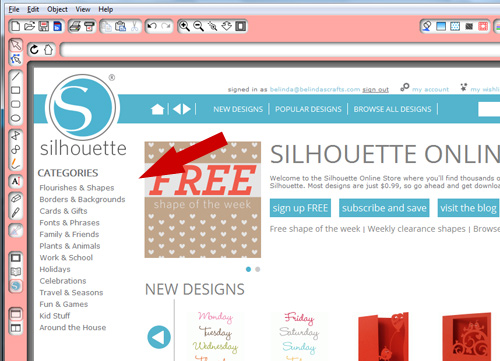
The first thing you should do is look at the categories that Silhouette has created in their store. They have 13 main categories and subcategories under each.This gives you an idea for a basic filing system and then from there you can expand to meet your needs. When you create your organizational structure around the Silhouette system, it makes it easy to know where to file the files once you buy them and quicker to find them later.

I have  attached included a list (in PDF format) of all the categories and subcategories.  Print them out for reference and then open up your Silhouette software.

To Create a Folder:

organization3

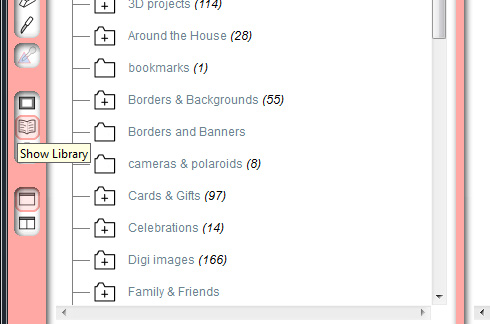
  • Click on Show Library icon
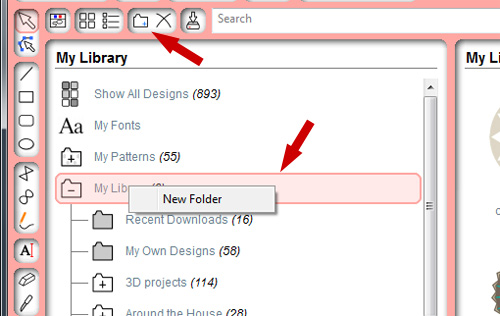
  • Then click on the New Folder icon on the top task bar or Right click on the My Library icon to create a new folder.

organization4


  • Then type the name for the folder. Use the PDF print out to guide you. Continue creating the 13 main categories and then you can go back and create sub categories (folders).

To create subcategories:

  • Click on the folder you want to create a subcategory under and click on the New Folder icon or right click the folder you want to have sub folders under.
  • Then name the folders.
  • Continue until you have as many as you like. I used their 13 main categories and then I modified a few to meet my specific needs.

Overall, you will find it easier to build off of their list because you will be able to file them as soon as you download them.

I still find this machine incredibly fun to use and look forward to expanding my knowledge and sharing it with you. Thanks for joining me today.

Happy Crafting!!!

Belinda

Silhouette Sunday – #2

Hello Everyone! Well it is week two of Silhouette Sunday and I am still continuing to explore my Silhouette. I learned how to perform a print and cut.  This has proven to be a major blessing for me because I hand color and cut my cards. So if I can cut down on production time in any way it is great news.  Next week I will share with you how to print and cut digital images and I will include a cheat sheet you can print and cut that you can use to remember the steps.

Yesterday I was printing and cutting one of my new digi images and I came across a problem and instead of searching for a solution on the web I played around and found a solution. I will, however explore this feature further online and in the manual and provide more in-depth information in the future.

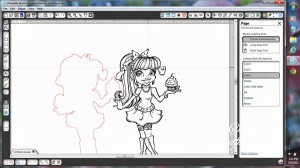
Creating outline for digital image.

Creating outline for digital image.

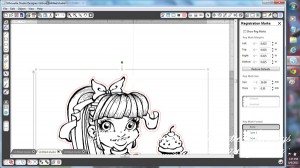
What happened was that I got to the point where I was in the Trace Window and I had created the Outer Edge of the image (you see it in red to the left of the image).   Well I noticed the outlines for her bows on her head were not quite right. They were a little short.

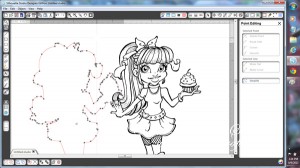
click on edit points

click on edit points

So I clicked on Edit Points in the task bar on the left.  You then can see all the points on the outline.

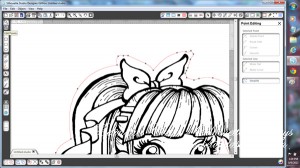
The bow on her hair was cut off.

The bow on her hair was cut off.

Then I moved the image back  onto the outline and I could better see where the red lines cut off the bows. I began clicking on the points and moving them out.

dfafad gdag

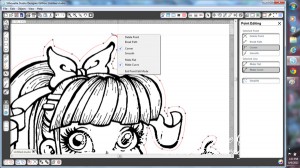
Additional edit points menu when you right click on the points.

I noticed that the moved out and were forming a straight path. So I right clicked while on a point and an additional menu for editing points appeared. I saw the option to make rounded points. And for this instance the bow was rounded at the tip so I clicked on rounded and was pleasantly surprised to see that when I moved the point out further it outlined the bow without cutting it off.

perfect outline

perfect outline

I learned that you can edit the points on the outlines and how to accommodate curved paths.  This will come in handy in the future.  Well I hope I haven’t confused you and if nothing else inspired you to explore this amazing tool more because there is always more to learn.

Thanks for travelling through this journey with me.

Belinda


Follow

Get every new post delivered to your Inbox

Join other followers: